flutter开发实战-ListWheelScrollView与自定义TimePicker
最近在使用时间选择器的时候,需要自定义一个TimePicker效果,当然这里就使用了ListWheelScrollView。ListWheelScrollView与ListView类似,但ListWheelScrollView渲染效果类似滚筒效果。
一、ListWheelScrollView
基本用法
  ListWheelScrollView({
    super.key,
    this.controller,
    this.physics,
    this.diameterRatio = RenderListWheelViewport.defaultDiameterRatio,
    this.perspective = RenderListWheelViewport.defaultPerspective,
    this.offAxisFraction = 0.0,
    this.useMagnifier = false,
    this.magnification = 1.0,
    this.overAndUnderCenterOpacity = 1.0,
    required this.itemExtent,
    this.squeeze = 1.0,
    this.onSelectedItemChanged,
    this.renderChildrenOutsideViewport = false,
    this.clipBehavior = Clip.hardEdge,
    this.restorationId,
    this.scrollBehavior,
    required List<Widget> children,
  })
ListWheelScrollView的一些属性,如children是子控件
- children是子控件,
- itemExtent是每个item的高度
- magnification是圆筒直径和主轴渲染窗口的尺寸比,默认值是2
- perspective是圆柱投影试图,为0表示从无限远处看,1表示从无限近处看。默认值0.003
- offAxisFraction表示圆筒水平偏移中心的程度
- magnification与useMagnifier放大镜,分辨设置放大镜与放大倍率。
- squeeze表示圆筒上子控件数量与在同等大小的平面上的子控件的数量之比。
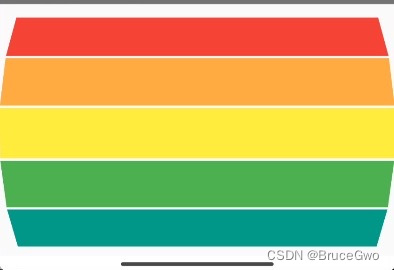
看下ListWheelScrollView基本用法
Container(
          height: 250,
         child: ListWheelScrollView(
            itemExtent: 50,
            children: [
              Container(
                color: Colors.red,
              ),
              Container(
                color: Colors.orangeAccent,
              ),
              Container(
                color: Colors.yellow,
              ),
              Container(
                color: Colors.green,
              ),
              Container(
                color: Colors.teal,
              ),
              Container(
                color: Colors.blue,
              ),
              Container(
                color: Colors.purple,
              ),
            ],
          ),
        )
效果图如下

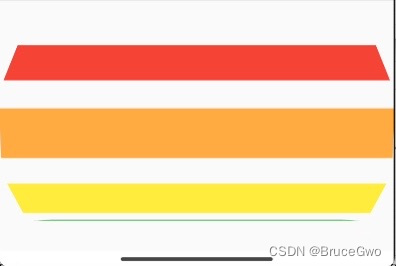
如果将diameterRatio调整为1的
效果图如下
其他属性的效果可以逐个尝试一下。
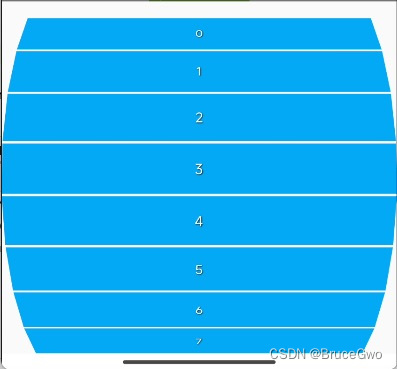
如果使用的数据比较多时候,可以使用userDelegate方式, 使用ListWheelChildBuilderDelegate来指定builder与childCount.
 Container(
          height: 350,
          child: ListWheelScrollView.useDelegate(
            itemExtent: 50,
            diameterRatio: 2,
            childDelegate:
                ListWheelChildBuilderDelegate(builder: (context, index) {
              return Container(
                color: Colors.lightBlue,
                alignment: Alignment.center,
                child: Text("$index",
                    style: TextStyle(color: Colors.white, shadows: [
                      Shadow(
                          color: Colors.black,
                          offset: Offset(.5, .5),
                          blurRadius: 2)
                    ])),
              );
            }, childCount: 100),
          ),
        );
效果图如下
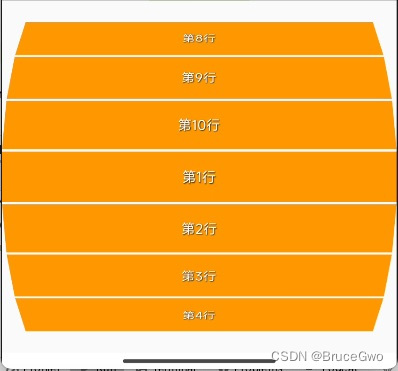
当然还有一个ListWheelChildLoopingListDelegate可以表现出来循环滚动的效果
final List dataList = [
    "第1行",
    "第2行",
    "第3行",
    "第4行",
    "第5行",
    "第6行",
    "第7行",
    "第8行",
    "第9行",
    "第10行",
  ];

  Widget buildChildItem(String text) {
    return Container(
      color: Colors.lightBlue,
      alignment: Alignment.center,
      child: Text("$text",
          style: TextStyle(color: Colors.white, shadows: [
            Shadow(
                color: Colors.black,
                offset: Offset(.5, .5),
                blurRadius: 2)
          ])),
    );
  }

  void testListWheelScrollViewDelegate(BuildContext context) {
    showModalBottomSheet(
      context: context,
      isScrollControlled: true,
      builder: (ctx) {
        return Container(
          height: 350,
          child: ListWheelScrollView.useDelegate(
            itemExtent: 50,
            diameterRatio: 2,
            childDelegate: ListWheelChildLoopingListDelegate(children: dataList.map((e) => buildChildItem(e)).toList())),
        );
      },
    );
  }
效果图如下
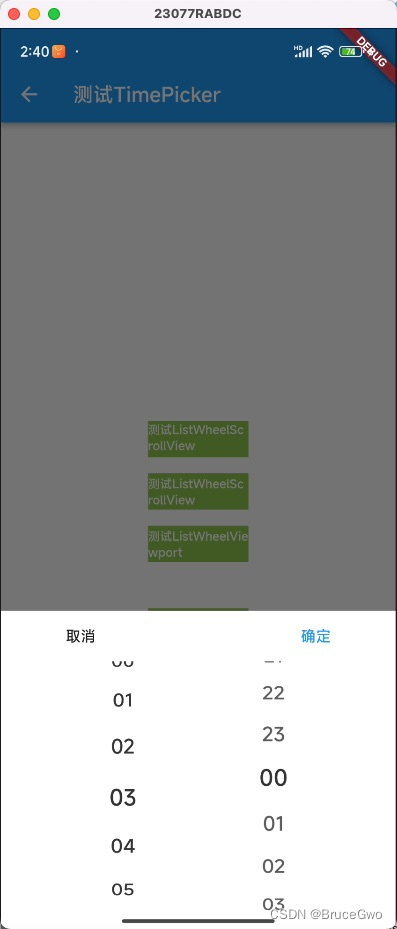
二、自定义TimePicker
自定义TimePicker使用ListWheelScrollView
自定义TimePicker有小时和分钟,左边显示小时,右边显示分钟。点击确定确认选择的时间,时间格式为10:20
onSelectedItemChanged来确认选择的item

完整代码如下
class CustomTimePicker extends StatefulWidget {
  const CustomTimePicker({
    super.key,
    this.width,
    this.height,
  });

  final double? width;
  final double? height;

  @override
  State<CustomTimePicker> createState() => _CustomTimePickerState();
}

class _CustomTimePickerState extends State<CustomTimePicker> {
  List<String> hourData = [];
  List<String> minuteData = [];

  String selectedHour = "";
  String selectedminute = "";

  @override
  void initState() {
    // TODO: implement initState
    super.initState();
    for (int i = 0; i < 24; i++) {
      String hour = i.toString();
      if (i < 10) {
        hour = "0" + i.toString();
      }
      hourData.add(hour);
    }

    for (int i = 0; i < 60; i++) {
      String minute = i.toString();
      if (i < 10) {
        minute = "0" + i.toString();
      }
      minuteData.add(minute);
    }
  }

  @override
  void dispose() {
    // TODO: implement dispose
    super.dispose();
  }

  Widget buildItem(String text) {
    return Text(
      text,
      textAlign: TextAlign.center,
      softWrap: true,
      style: TextStyle(
        fontSize: 20,
        fontWeight: FontWeight.w500,
        fontStyle: FontStyle.normal,
        color: Color(0xFF333333),
        decoration: TextDecoration.none,
      ),
    );
  }

  @override
  Widget build(BuildContext context) {
    return Container(
        width: widget.width,
        height: widget.height,
        color: Colors.white,
        child: Column(
          mainAxisAlignment: MainAxisAlignment.center,
          children: [
            Container(
              width: widget.width,
              height: 50,
              child: Row(
                mainAxisAlignment: MainAxisAlignment.center,
                crossAxisAlignment: CrossAxisAlignment.center,
                children: [
                  TextButton(
                    onPressed: () {
                      Navigator.of(context).pop();
                    },
                    child: Container(
                      height: 36,
                      width: 100,
                      color: Colors.transparent,
                      alignment: Alignment.center,
                      child: Text(
                        '取消',
                        style: TextStyle(fontSize: 15, color: Colors.black87),
                      ),
                    ),
                  ),
                  Expanded(
                    child: Text(
                      '${selectedHour}:${selectedminute}',
                      textAlign: TextAlign.center,
                      style: TextStyle(fontSize: 16, color: Colors.black87),
                    ),
                  ),
                  TextButton(
                    onPressed: () {
                      Navigator.of(context).pop();
                    },
                    child: Container(
                      height: 36,
                      width: 100,
                      alignment: Alignment.center,
                      child: Text(
                        '确定',
                        style: TextStyle(fontSize: 15, color: Colors.blue),
                      ),
                    ),
                  ),
                ],
              ),
            ),
            Expanded(
              child: Row(
                mainAxisAlignment: MainAxisAlignment.center,
                crossAxisAlignment: CrossAxisAlignment.center,
                children: [
                  Container(
                    width: 150,
                    height: widget.height,
                    child: Scrollable(
                      axisDirection: AxisDirection.down,
                      physics: BouncingScrollPhysics(),
                      dragStartBehavior: DragStartBehavior.start,
                      viewportBuilder: (ctx, position) =>
                          ListWheelScrollView.useDelegate(
                        itemExtent: 44,
                        squeeze: 1,
                        diameterRatio: 3,
                        useMagnifier: true,
                        overAndUnderCenterOpacity: 0.8,
                        magnification: 1.1,
                        onSelectedItemChanged: (index) {
                          String hour = hourData[index];
                          print("hour:${hour}");
                          setState(() {
                            selectedHour = hour;
                          });
                        },
                        childDelegate: ListWheelChildLoopingListDelegate(
                            children:
                                hourData.map((e) => buildItem(e)).toList()),
                      ),
                    ),
                  ),
                  Container(
                    width: 150,
                    height: widget.height,
                    child: Scrollable(
                      axisDirection: AxisDirection.down,
                      physics: BouncingScrollPhysics(),
                      dragStartBehavior: DragStartBehavior.start,
                      viewportBuilder: (ctx, position) =>
                          ListWheelScrollView.useDelegate(
                        itemExtent: 44,
                        squeeze: 1,
                        diameterRatio: 3,
                        useMagnifier: true,
                        overAndUnderCenterOpacity: 0.8,
                        magnification: 1.1,
                        onSelectedItemChanged: (index) {
                          String minute = minuteData[index];
                          print("minute:${minute}");
                          setState(() {
                            selectedminute = minute;
                          });
                        },
                        childDelegate: ListWheelChildLoopingListDelegate(
                            children:
                                minuteData.map((e) => buildItem(e)).toList()),
                      ),
                    ),
                  ),
                ],
              ),
            ),
          ],
        ));
  }
}
效果图如下
三、小结
flutter开发实战-ListWheelScrollView与自定义TimePicker
学习记录,每天不停进步。